Build a Package Itinerary
Itinerary used to build the day-by-day structure for a package.
The itinerary is shown on the public package page so travelers can understand the route, daily activities, meals, accommodation, and places visited.
Before you start
Section titled “Before you start”Complete these package sections first:
- Basics: package name, country, duration, featured image.
- Content: English title, summary, and overview.
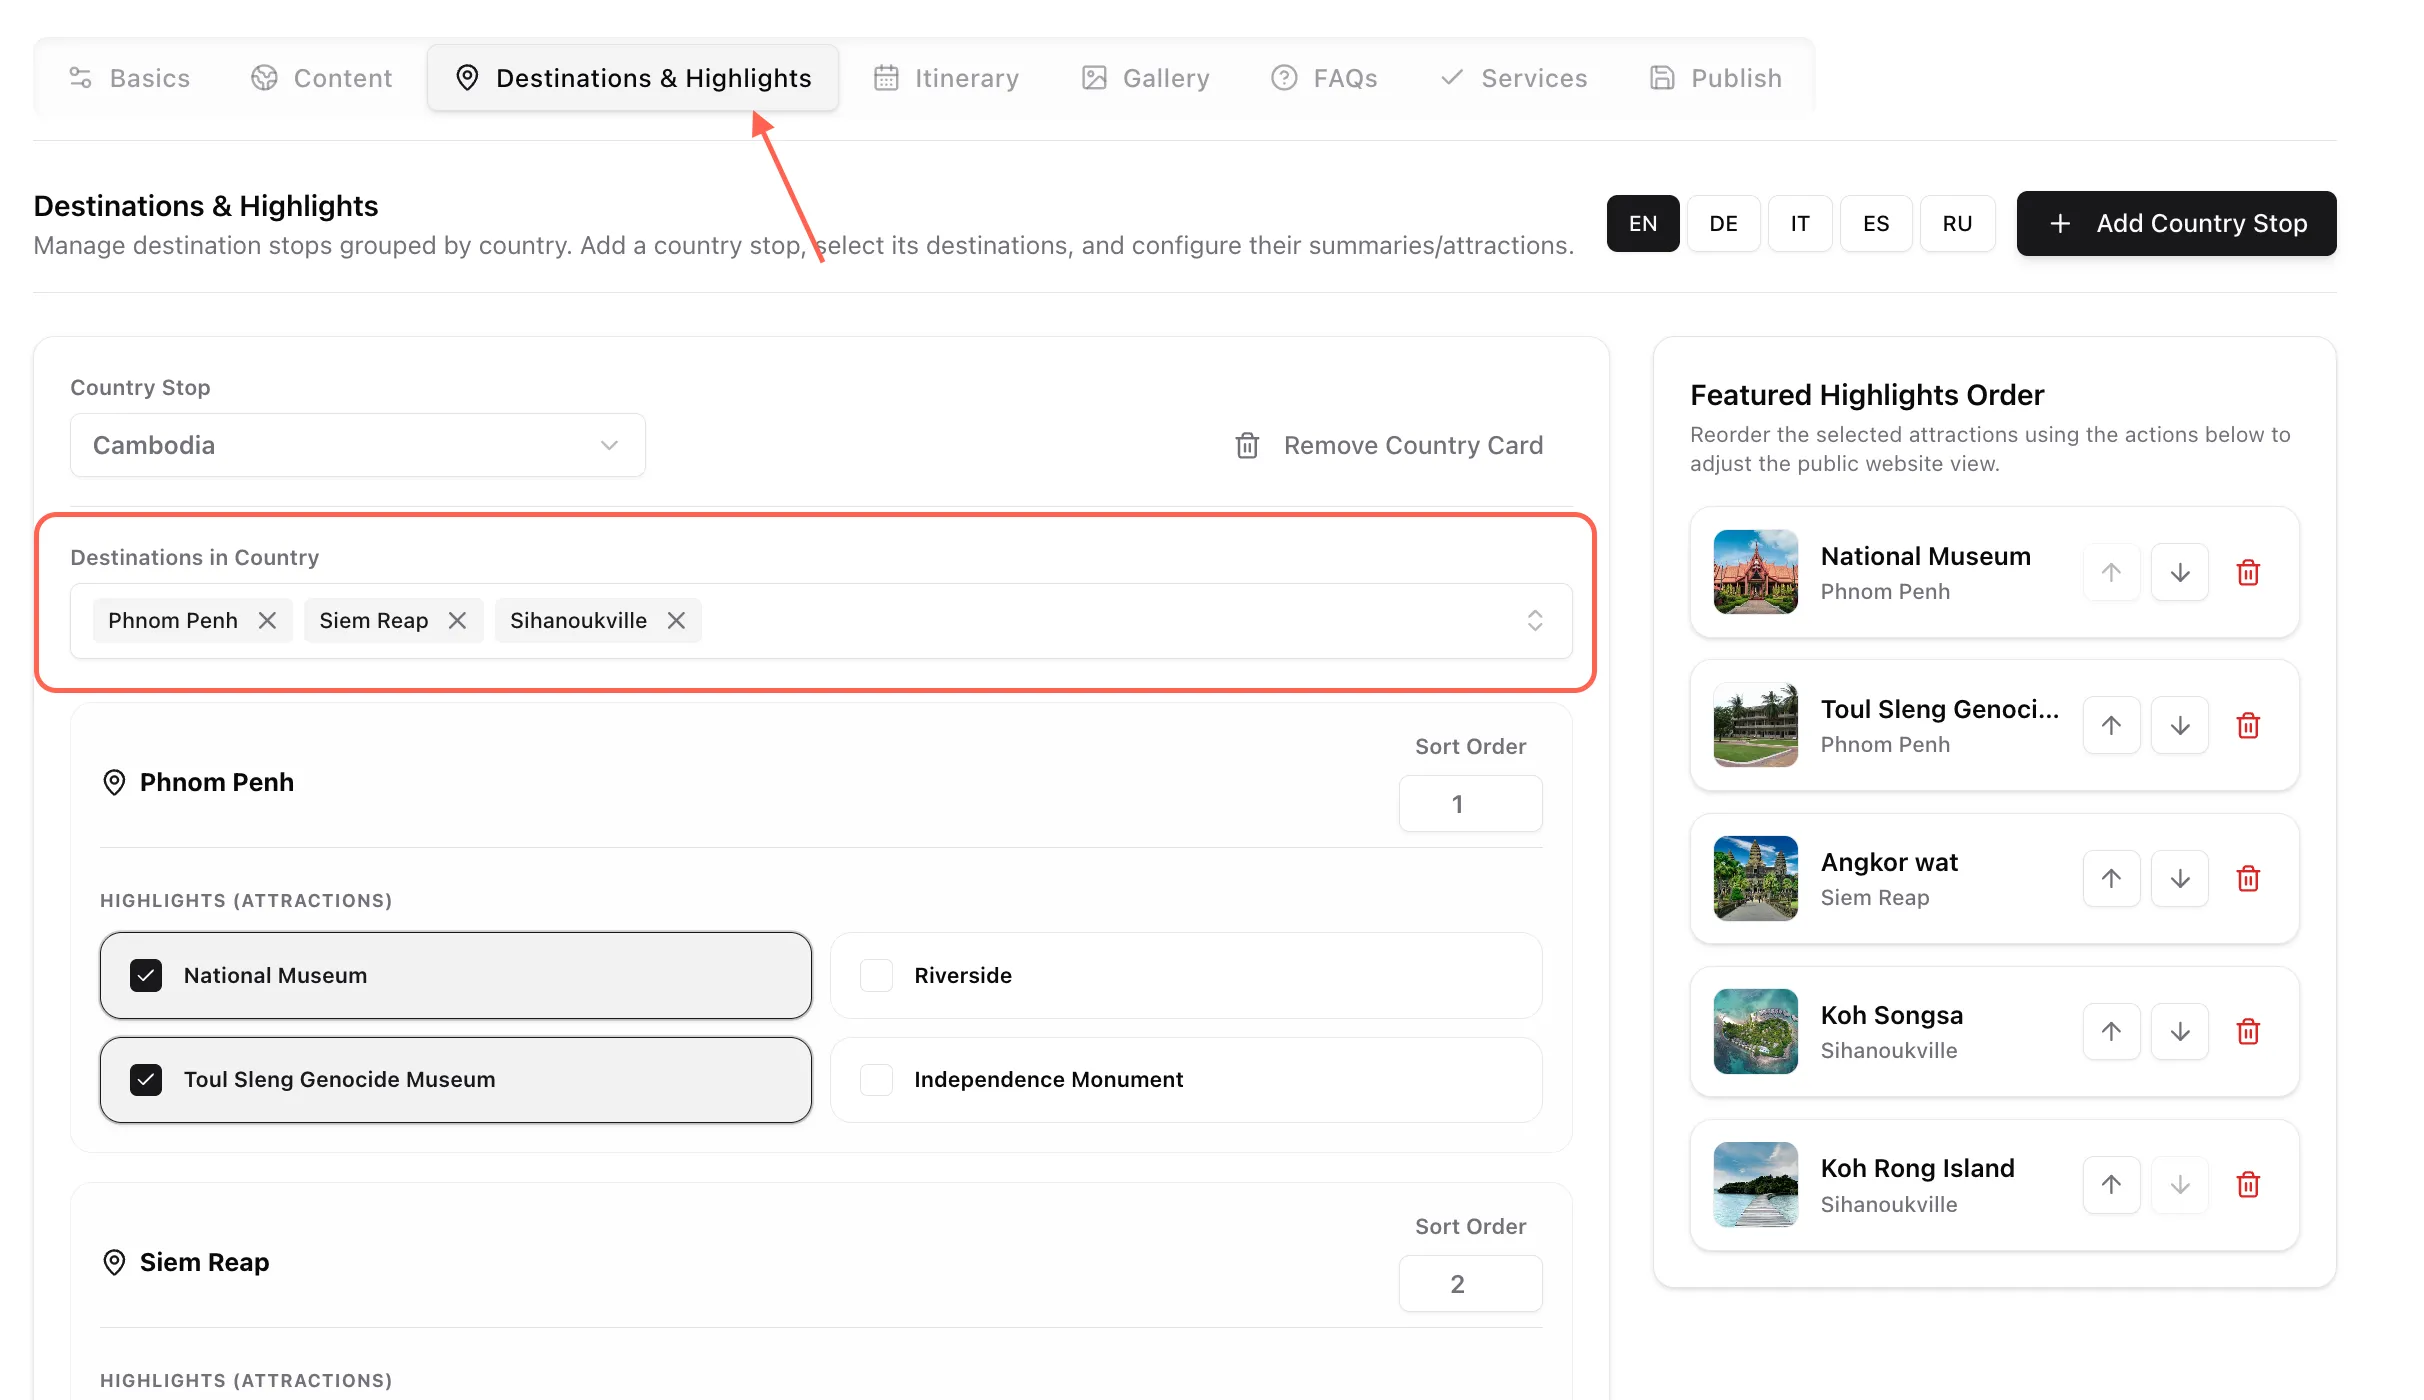
- Destinations: package destinations.
Places visited in the itinerary depend on the destinations selected for the package. If no destinations are selected, the places catalog will be empty.
Add a day image
Section titled “Add a day image”Use Day image to choose a photo for the selected day.
Good day images should show:
- A key destination visited that day.
- A real activity or experience.
- A hotel, restaurant, landscape, cultural site, or local scene relevant to the day.
Avoid using the same generic image for every day.
Assign places visited
Section titled “Assign places visited”Use Places visited this day to connect the day to specific places.
The right side shows the available place catalog. The left side shows the selected route timeline for the day.
To assign places:
- Search or browse the place catalog.
- Select each place visited that day.
- Review the route timeline on the left.
- Use the up/down arrows to adjust place order.
- Use the remove icon to remove a place from the day.
If no places appear, check that package destinations were added in the Destinations tab.
Add the day title
Section titled “Add the day title”Use Title for the short public heading for the day.
Good examples:
Arrival in Phnom PenhExplore Angkor Wat and Angkor ThomCruise Ha Long BayFree Morning and Departure
Avoid vague titles like:
Day 1TourSightseeing
Add subtitle or route line
Section titled “Add subtitle or route line”Use Subtitle / route line for a short location or movement summary.
Examples:
Phnom PenhSiem Reap - Angkor TemplesHanoi - Ha Long BayLuang Prabang
Keep it short. Longer descriptions belong in the body rich text.
Write the body content
Section titled “Write the body content”Use Body rich text for the main day description.
Good body content explains:
- What happens that day.
- Important visits or activities.
- Travel movement between places.
- Free time, if any.
- Useful context for the traveler.
Keep the tone clear and practical. Avoid over-promising or adding operational details that may change often.
Add meals
Section titled “Add meals”Use Meal plan to mark meals included for that day.
Available options:
- Breakfast
- Lunch
- Dinner
Checking meals automatically creates a localized meal item for the day.
Only check meals that are actually included in the tour.
Add a restaurant
Section titled “Add a restaurant”Use Restaurant (Lunch/Dinner location) when the day should show a restaurant.
To select an existing restaurant:
- Open the restaurant dropdown.
- Choose the restaurant.
- Save the package.
To add a restaurant quickly:
- Click the plus button beside the restaurant dropdown.
- Enter the restaurant name.
- Select country, if known.
- Add location, if useful.
- Add a short summary.
- Click Create Restaurant.
The new restaurant is added to the shared restaurant list and selected for the day.
Add accommodation
Section titled “Add accommodation”Use Accommodation / Hotel when the day should show a hotel.
To select an existing hotel:
- Open the hotel dropdown.
- Choose the hotel.
- Save the package.
To add a hotel quickly:
- Click the plus button beside the hotel dropdown.
- Enter the hotel name.
- Select country, if known.
- Add star rating, if known.
- Add location, if useful.
- Add a short summary.
- Click Create Hotel.
The new hotel is added to the shared hotel list and selected for the day.
Remove a day
Section titled “Remove a day”Use Remove Day only when the selected day should be deleted from the itinerary.
Before removing:
- Confirm you selected the correct day.
- Check whether later day numbers need to be adjusted.
- Save after removal.
Removing a day does not automatically rewrite the remaining day titles or body text.
Work with translations
Section titled “Work with translations”The day structure is shared across languages.
Shared across all languages:
- Day number
- Sort order
- Day image
- Places visited
- Hotel
- Restaurant
- Meal selection
Localized per language:
- Day title
- Subtitle / route line
- Body rich text
Recommended workflow:
- Build the full itinerary in English.
- Confirm the day order and places are correct.
- Switch locale.
- Translate each day title, subtitle, and body.
- Save after finishing each language.
Common mistakes
Section titled “Common mistakes”| Mistake | Better action |
|---|---|
| Adding itinerary before destinations | Add package destinations first so places are available. |
Using only Day 1, Day 2 as titles |
Use descriptive day titles. |
| Forgetting to save after quick-adding a hotel | Create the hotel, confirm it is selected, then save the package. |
| Marking meals that are not included | Only check included meals. |
| Adding long route text into subtitle | Keep subtitle short; use body text for detail. |
| Removing a day without checking order | Review day numbers and sort order after removal. |